Beef Chuck Roast Smoked

Cook date was April 3, 2016. The process below was derived from:

  • the Smoky Au Jus recipe and method by Chef Jimmy J (click here)20160403_125158
  • the sear-first brisket technique by SmokieOakie (click here)
  • the pulled BBQ beef chuckie by PatioDaddio at BBQ Brethren (click here)

Had thawed out the 3 lb. chuck roast and rubbed in kosher salt and fresh rough ground black pepper on April 1. Placed back on foam plate wrapped in plastic to dry-brine in the refer.20160403_125506

Ambient temp is about 74 degrees.

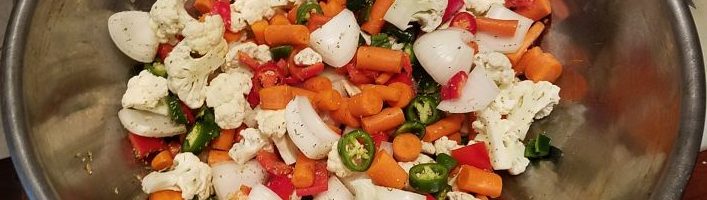
12:30 PM – Lite a 3/4 chimney of KBB and let it get going to near the top. Began searing the roast in a No. 12 cast iron skillet with bacon grease. Seared it on all sides and left it sitting in the hot skillet. Poured the lite briquets into one end of the SnS. Added the aluminum pan with veggies over the foil on the fire grate next to the SnS.

1:15 PM – Placed the meat grate on and added the roast. Poured the grease from the skillet over the roast. 20160403_134206Added 1/4″ inch of water to the skillet and heated it to boiling to get the spices and bacon grease that remained. Poured that into the pan with the veggies. Filled the slot in the SnS with hot water. Added a small chunk of pecan. Fitted the ChefAlarm with the grate clip and the lid with alligator clips. The grate temp fell from the 325 it had gotten to with the vents fully open to 275 with the closed down to a crack in the bottom and 1/4 for the top vent.

2:30 PM – Grate temp is staying no higher than 295 as it has been since everything settled down. Add small pecan chunks as they burn away every 15 minutes or so but the smoke level is very thin and you can see through it. Must be a clean smoke.20160403_181022

3:00 PM – Added more briquettes to get the temp up to 300-350 as it should have been per PatioDaddio for his ” fast cook” method.

3:30 PM – Grate temp rose to 300 and stayed in the 250-300 range.

5:30 – Grate temp is 325. Removed alum tray with veggies. Cut quartered large union into smaller pieces as well as carrots and celery into 1′ long pieces. Put into smaller  dutch oven and with all the juices and added one can of french onion soup. Set stove to simmer.

In the mean time, “Gawma” made 20160403_163240Fleishman’s cornbread and spooned it into halves of large jalapeno peppers from which I had removed the seeds and interior membrane. Also pressed some batter into small porta bella mushrooms. Baked them until the cornbread was the right look. The jalapeno filled breadsticks were NOT spicy and the mushrooms were still firm when the cornbread was done. The cornbread too easily fell out of the soft jalapeno halves but the jalapenos were sweet–not hot. The mushroom caps looked like little toad stools and tasted good. 

6:00 PM –20160403_180535 Gawma said we needed to eat so took the roast off. The smaller end was at 199 and the larger end–where the temp probe did not enter easily-was at 165-170. Put the larger end under foil into the oven at pre-warmed to 350. Ate the smaller end that was at 199. Very tender but not pull apart. That was very ok!

6:40 PM – The part that was cooler is now at 205 so removed it from the oven.

20160405_190921A lot of work for a small piece of meat but it was very good. Plus the veggies were also great.

Next Time:

  1. Start out at a grate temp of 300-350 and smoke it 3 hours then wrap and into the oven.
  2. Do not add water to the veggie tray as it blocks the smoke.
  3. Review the SnS web site method at http://www.abcbarbecue.com/#!pulled-beef-chuck-roast/c1482
  4. Try injecting like OldFatGuy did here.


5 Star BBQ Beef Sandwich with Blue Cheese Coleslaw ToTry

From  March 28, 2016

This recipe will make 6 super large or 10 medium sized sandwiches.

INGREDIENTS:

For the Beef:
1 boneless beef chuck-eye roast (about 4 – 5 pounds)
1 tablespoon table salt (iodized salt)
1 tablespoon freshly ground black pepper
1 teaspoon cayenne pepper
3 cups wood chips, soaked for 15 minutes
6 soft hamburger buns

For the Sauce:
1 onion, finely chopped
4 garlic cloves, minced
1/2 teaspoon chili powder
1 1/4 cups ketchup
3/4 cup strong brewed coffee
1/2 cup cider vinegar
1/2 cup packed brown sugar
3 tablespoons Worcestershire sauce
1/2 teaspoon freshly ground black pepper

For the Coleslaw:
1/2 small head green cabbage, finely shredded
1/2 small head purple cabbage, finely shredded
3 large carrots, peeled and grated
1 cup mayonnaise
2 tablespoons Dijon mustard
1 tablespoon whole grain mustard
1 tablespoon plus 1 teaspoon cider vinegar
1/2 teaspoon celery salt
1/4 teaspoon Kosher salt
1/4 teaspoon freshly ground black pepper
3/4 cup (about 3 ounces) crumbled blue cheese
1/2 cup parsley, coarsely chopped

METHOD:
Prepare the Beef: In a small bowl, make a rub by combining the salt, pepper and cayenne. Slice the roast into 4 equal sized pieces and remove any excess fat or gristle. Rub the meat on all sides with the salt mixture then wrap each piece tightly in plastic wrap. Place the meat on a plate and allow to sit overnight in the refrigerator.

Smoke the Beef: Unwrap the beef and place them in a single layer in a large disposable aluminum roasting pan. Neatly wrap the soaked wood chips in a large piece of heavy-duty aluminum foil and poke a few holes in it to allow smoke to escape. Open the bottom vent of the grill and light 50 coals in a chimney starter. When the coals are covered in a fine gray ash pour them in a single pile on only one side of the grill. Place the foil packet directly on top of the hot coals and place the lid on the grill. Set the cooking grate in place and adjust the vents on the lid of the grill until they are halfway open. When the wood chips begin to smoke heavily (after about 5 minutes) place the roasting pan on the side of the grill opposite the coals. Place the lid back on the grill with the vent holes directly over the beef and allow to smoke/roast for about 2 hours, until aromatic and deep red in color.

Braise/Roast the Beef: Preheat the oven to 300° F and adjust rack to the lower-middle position. Remove the roasting pan from the grill and turn each piece of beef over. Cover the pan tightly with foil and place in the oven and bake until the meat is fork tender, about 2-3 hours. Remove the beef from the pan, tent it loosely with foil and allow it to rest for at least 30 minutes. While the meat is resting, pour off the pan drippings into a gravy separator. Reserve 2 tablespoons of the separated fat and strain the remaining juices, reserving 1/2 cup of liquid.

Meanwhile, make the Blue Cheese Coleslaw: In a medium bowl, whisk together the mayonnaise, both mustards, vinegar, celery salt, Kosher salt and pepper. Pour enough of the mayonnaise dressing over the shredded cabbages and grated carrots to moisten them. Add in the crumbled blue cheese and chopped parsley and toss well to combine. Cover the bowl and refrigerate for a few hours to allow the flavors to combine.

Make the Barbecue Sauce: Combine the onion and reserved fat in a saucepan over medium heat. Cook, stirring occasionally until the onion has softened, about 10 minutes. Add the minced garlic and chili powder and cook, stirring constantly until well combined and aromatic, about 30 seconds. Stir in remaining sauce ingredients and reserved juices and simmer until thickened, about 15-20 minutes. Allow the sauce to cool slightly before straining the sauce if you prefer a velvety texture.

Assemble the Sandwiches: Split and lightly toast each hamburger bun. Using 2 forks, pull the beef apart into shreds, discarding any excess fat or gristle. In a saucepan set over low heat, toss the beef with enough barbecue sauce to moisten the meat well. When heated through, place the sauced beef on top of the bottom half of each bun. Top the beef with some of the blue cheese coleslaw, add the top half of the bun and serve immediately.

Louisiana Crawfish & Shrimp Etouffee

First made on March 31, 2016 and it was great. A bit spicy.

Ingredients

1 C (2 sticks) butter – [Original recipe called for 3/4 C and the extra butter made it very rich along with the broth rather than just water.]
1 large onion, chopped
4 cloves garlic, chopped
1/4 C all-purpose flour
1 large green bell pepper, chopped
1 lb. boiled crawfish tails
1 lb. of boiled shrimp – re-seasoned with seasoning used in Shrirmp & Grits recipe
3 T tomato sauce
1 can of chicken broth
6 green onions, chopped
salt and pepper to taste
2 T Best Stop’s Cajun seasoning from Scott, LA. [Very spicy. Warmed up two days later it was too hot for even Kelley. Original recipe called for 1.5 T.]

Directions

  1. Melted the butter in the large red cast-iron, enamel lined, braiser over medium heat. Added the onion and green pepper, and saute until onion is transparent.
  2. Stir in the garlic, and cook for a minute.
  3. Stir in the flour until well blended.
  4. Gradually stir in the tomato sauce and chicken broth.
  5. Add the green onions and season with salt, pepper, and Cajun seasoning. Simmer for 5 to 10 minutes over low heat.
  6. Turn off until Tom get’s home.
  7. Since we were using the crawfish tails and shrimp that were already cooked during our Easter crawfish boil they were added just long enough to warm.
  8. Served over hot cooked rice with chopped green onions as a garnish.

This recipe was derived from one at AllRecipes.com – Click here.

Smokey Au Jus by Chef JJ – ToTry

  • 1- Lg Onion,
  • 4-5 Carrots,
  • 3-4 Ribs Celery
  • 3-4 Peeled Cloves of Garlic

Toss them in a pan under the Beef, and let the whole deal Smoke for one hour,

  • Then add 4-6 C beef broth,
  • 2 T tomato paste,
  • 1/2 t dry thyme (4-5 sprigs Fresh)
  • 1-2 ea bay leaf

Finish the Smoking process to the IT you want.

While the Roast is resting, dump the pan juices veggies and all into a 2-3 qt sauce pot and add 1 Cup red wine, something you like to drink, and bring the Jus to a boil, lower the heat and simmer 20-30 minutes. Strain out the veggies and let the Jus rest a minute or so for the fat to rise. Skim off the bulk of the fat then using strips of paper towel laid on top of the Jus, drag quickly across to take off the last little bit of fat.

The purpose of smoking the vegetable for 1 hour before adding the broth and herbs is that the smoked vegetables roast in the dry heat concentrating their flavors and sweetness giving the finished Jus a richer, deeper, full flavor.

Serve the Au Jus on the sliced beef or thicken the Jus to make Gravy.

From Smoking Meat Forum’s Post here.

Our First Crawfish Boil

March 26, 2016. Easter Sunday.

Mary made a double recipe of Treebeard’s Chicken, Sausage and Pork Tasso Jambalaya and a double batch of cornbread in our cast iron muffin pans. The day before we had made deviled eggs and bought a 29 lb. sack of crawfish at HEB for $1.97/lb and 5 lbs of headless, ez-peel shrimp.

  • 8 pcs. 3″ long frozen corn on the cob – fresh corn was not available in our local stores
  • 5 lbs, small red potatoes,
  • 24 oz. mushrooms
  • one large onion sliced in half and some celery tops
  • one pod of garlic
  • Zatarian’s Crawfish Boil, Extra Spicy plus their shrimp boil concentrate

The Plan as Executed

Crawfish table 2016 Easter 96dpiPreface:  I was assisted by Jeff and Maggie with Fang overseeing. Of course, Mary was there staging things and keeping up with the girls.
The primary reference for the plan was the crawfish recipe at http://www.gumbopages.com/food/seafood/craw-boil.html. This boil used Jeff’s ~24 qt. turkey fry pot.
  1. Washed the crawfish three times in the pot/strainer. Dumped them loose into the cooler–where they had been in the sack–onto the ice that was still in it. Added a thin layer of ice on top of them to keep them cool as the boil would start in 2-3 hours. [Loose in the cooler made it a pain to move them to the pot]
  2. Filled the boil pot about 2/3 with water.
  3. Added about 2.5 C of the seasoning mix and the onion, celery, and head of garlic. Poured in about 4 oz. Zat’s crab boil concentrate. Brought to a boil and liked the great smell that was fairly intense.
  4. Added the potatoes and cooked about 1 min/lb ~ 5 minutes. Mary checked with knife and they were close to ready.
  5. Add the frozen corn on the cob per the directions and cooked between 12 and 15 minutes as the pot returned to boiling. [note the potatoes were still not done likely as the frozen corn cooled it down too much and not enough time to complete the potatoes once it came back to a boil.]
  6. Dipped the potatoes and corn out and put into a large stock pot with water that had seasoning added for soaking. [this pot should have simmered for a while to extract the oils from the seasoning.]
  7. Boiled shrimp until 10-15 floated. Dipped them out and into warm soak pot with corn and potatoes.
  8. Added more Zat’s Extra Spicy. Brought pot back to boil.
  9. Moved potatoes and corn into a large plastic bowl that fit into the smaller blue Igloo cube cooler to serve as a faux cambro.
  10. Put shrimp on ice in a plastic bowl. [Should have lightly salted them when they came out of the water or now. But if boiling water had been right would not have needed more salt.]
  11. Boiled crawfish in four batches of different sizes as getting the live rascals out of the cooler was not easy. Dropped some on the driveway and got pinched a few times.
  12. Brought each batch to a boil for ~2-3 minutes then added to seasoned soak pot. Tasted a few and were too mild. Added more concentrate to boil pot and soak pot as well as the dry seasoning mix. Later batches still seemed not flavorful or spicy enough.
  13. Jeff reminded me that in the restaurants they shake the seasoning on in the serving tray. That way it gets on your fingers and the meat as you eat it. That kicked them up a lot.
  14. By the last boil the smaller blue cooler — that still had the large plastic pot holding the corn and potatoes — was within 6″ of being full of red boiled crawfish piled on as they came out of the soak pot.
  15. Served them outside on the patio by scooping the crawfish/corn/potatoes/garlic onto three baking sheets with Mary’s jambalaya (she referred to the Tree Beards recipe) on rice and deviled eggs.
  16. Results:Crawfish table 2016 Easter 2 96dpi

    1. The ez-peel shrimp were crunchy so were cooked right – but not very spicy. The float indicator of being done worked again. But I think the opened shell for the ex-peel had let too much water in and the seasoning did not stay. They also needed more salt than was in the mix.
    2. The potatoes had a nice flavor and some said theirs was very spicy. Most did not get cooked all the way through.
    3. The corn was almost mushy. Likely due to using the frozen kind of the very tender sweet corn. If it had been the typical field corn–as is bought in the husk– likely would not have been mushy.
    4. The garlic pod was still intact after about 30 minutes in the initial boiling process. The cloves were firm but slightly sweet. Very nice but not much seasoning taste although there were hints of it.
    5. The crawfish were all done fine despite the random boil times. None boiled more than 5 minutes and all were taken out when a lot had floated. For the final smaller batch poured in cool filtered tap water to stop the cook then they soaked in the boil pot for ~20 minutes.
    6. I believe we should have added some salt to the boil. The Extra Spicy Zat’s seasoning was not very salty. Maybe the amount put in the water was not enough although the seasoned water was very red and before the boil there was a rich froth. After it was over there was about 3/4″ of the seasoning remaining in its plastic jug. I do not think if that had been spread into the boils that small amount would have made a difference in the need to a little salt.
  17. Next Time:

    1. Taste the boil water and soak water to be sure of the level of salt.
    2. Use fresh corn
    3. Have a hook to catch the bottom of the steaming strainer to dump it and a long sleeve shirt or towel wrapped around the arm to block the steam.
    4. Simmer the seasoning pot for a while so the oils in the seasoning would have better leached into the water. That would have made it spicier. Could also have used a second seasoning pot for a longer soak time without delaying the next batch. A work table would have been great as the driveway did not afford a good work surface.
    5. Add 2 lbs. cajun sausage using half regular blend cut into 1″ long pieces and the other half Jalapeno cut into 1/2″ long pieces. Different lengths will warn the wimps of the hot ones while letting some of the heat into the boil.
    6. Add homemade Zat’s seasoning in a cache.
    7. Add lemons.

Pulled Pork Finishing Sauce

First time made at the farm during March 2016 work week. The foil wraps of the two halves of a Pork Butt had caught a lot of dark liquid that I poured into a SS bowl and into the refer to jell. The next morning removed the heavy grease layer to expose beautiful brown jelled drippings.

Heated the jelled drippings and measured it to find there was 1-1/4 cup. Added 1-1/4 cup of apple cider vinegar and one tablespoon of Stubbs hot pork rub as did not have the usual seasonings used in finishing sauces. Simmered it for 30 minutes or so. Nice addition to the pulled pork making it very moist with a lite spicey tone. The vinegar seemed like it would be too much while heating in the pot but almost did not notice it when poured on the meat.

Next time try the seasonings used in other recipes with the 1:1 ratio of drippings to vinegar.


5/21/2016 – Had 1C jellied drippings from Butt this date that had a heavy rub of course ground black pepper, granulated garlic and cayenne. See My Rub Development post here. Drippings came from the drip pan that had been in the smoke 6 hours plus what drained out of the finished butt in the foil. Added 1C Cider Vinegar and simmered for a while. Added couple shakes of course ground black pepper. Warmed the chopped pork in deep pot slowly then poured over this sauce hot and served. Very nice added moisture.

Next time add a little cayenne.

Pork Butt smoked at Sundown Farms on St. Patrick’s Day

Afternoon before cut the 9.5 lb. roast in half and smeared with yellow mustard. Then rubbed in a solid coating of Stubbs Hot Pork Rub. put back in cryo bag and back to refer.

About 7:30 AM lite a half chimney of briquettes and when only a little black still showing poured them into the tray of the Great Smokey Mountain smoker. Added two 3″ diameter pecan logs and a long 1″ log.

About 8:30 the logs were burning and making a lot of smoke. Added the two roasts on separate racks, closed her up and adjusted the vents until is stayed in the 220-240 range.

Monitored grate temp on lower meat grate and it went up and down a lot as the logs would burn away from each other. Then when pushed them together and added some, they would finally flame up and the temp soar to 300+. I was watching each time and closed the vents some and the temp would drop fast and stabilize in the right range.

At 3 pm, moved the ChefAlarm probe to internal and found only 140. Moved it to the other roast and found 144. Removed and wrapped them in foil. Placed them in Hamilton Beach roaster set at 225.

At 6pm moma had to eat. Internal was only up to 190  and 194 in the smaller one. They were not pull apart tender with a lot of visible fat seams. Ate pieces from the small one that was ok tender but not done to pull apart standards.

The foil wraps had caught a lot of dark liquid that I poured into a SS bowl and into the refer to jell. The next morning removed the heavy grease layer to expose beautiful brown jelled drippings.

Next afternoon about 2PM – Put both wrapped in foil back into HB Roaster set at 300 knowing the roasted setting is 20-degrees higher than the actual cooking temp. Set ThermoWorks to alarm at 203 in the smaller one. When it alarmed, removed that roast and inserted probe in the larger one. Ate the smaller one and it was pull apart tender with a less grey color. Ten degrees made a lot of difference.

Heated the jelled drippings and measured it to find there was 1-1/4 cup. Added 1-1/4 cup of apple cider vinegar and one tablespoon of Stubbs hot pork rub as did not have the usual seasonings used in finishing sauces. Simmered it for 30 minutes or so. Nice addition to the pulled pork making it very moist with a lite spicey tone. The vinegar seemed like it would be too much while heating in the pot but almost did not notice it when poured on the meat.

Note – The above notes about the finishing sauce were copied into a separate post this date.

Keith’s Pulled Pork Dipping Sauce

Keith’s famous pulled pork finishing and dipping sauce.

1 cup apple cider vinegar
1 cup catsup
1 T red pepper flakes
1 T worcestershire sauce
1/4 cup brown sugar
1 T salt
1 T cayenne pepper

Simmer after you make it and again before serving.

March 2016 – First time for a pulled pork shoulder blade roast. When added the level TS of Cayenne it looked too much so scoped out maybe a third. Sauce was very good and only a little spicy.The full TS may have been ok. Will try this again as it was good. Try adding 1 T each of Worchestershire and garlic.

Pop’s Breakfast Sausage

Below extracted from here.

“Now, the one recipe I can share is my dad’s from his grocery store for his pan sausage (breakfast sausage). He sold tons of this, it’s an old-fashioned recipe from the family farm and is quite simple and basic:

Mix together :

8 oz. salt
2oz. black pepper
1oz. ground sage

Mix well.

Measure out 1/2 ounce of seasoning per pound of meat: 4oz for 8lbs.

Cut pork into 1″ or so cubes. Mix with seasoning and let set 10 min. for the salt to pull out some moisture, then remix.

Grind once or twice thru a fine plate (depends on your preference) for patties. Or, grind once, then stuff into 19mm lamb casings for little links, or 28mm to 32mm hog casings to smoke for smoky breakfast sausages.

Again, if you’re using other than full lbs. of product, you can re-proportion as described above!”

Pop’s Calcs

Click here to read the full post from which the advice below is extracted.

…”so I may only have 3 lbs. 5 oz.. of pork reserved for the Polish Sausage. How to I translate the ingredients from 25lbs. to 3lbs. 5oz. accurately so I get it right? Especially if you’re dealing with 1 oz of something that is critical not to use too much (nitrite)?

Well, first you have to find out your proportional amount. So, divide the amount you’re going to use (3lb. 5oz.) by the weight listed (25 lbs). But, you’re dealing with pounds and ounces and that won’t divide out. However, if you convert them to ounces, you can divide those:
at 16oz. per pound, 3lb. 5oz is 53oz. (48+5) and 25lb. is 400. 53 divided by 400 = .1325 or 13.25%. You’re using 13.25% of the full amount, so therefore, you can use 13.25% of each ingredient to make it proportionally correct.
Now, however, it’s hard to figure out what 13.25% of 11 oz. is. But, if you convert your ounces to grams, then it’s easy as grams are based on 10’s and are a much smaller measurement. If you print out a conversion chart from:
http://www.metric-conversions.org/co…sion-chart.pdf
you can see that 11 oz. is 311.84 grams (make it 312). Multiply 312 by .1325 and you have 41.34 grams, or about 41 grams is close enough. So, you’d measure out on your scale set to grams 41 grams of seasoning.

1oz. of cure would be .1325 of 28.34 grams, or 3.75 grams of cure – measure out just 4 grams is as accurate as you can get.

2 oz. of binder would be 56.69 x .1325 or 7.51 grams, measure 8 grams.

3lbs. of water would be 3×16 or 48 oz., which is 1360.77 grams x .1325, or 180.30 g. – measure 180 grams.

Now, put a small container on your scale and set the tare to zero. Set the scale to grams, add water to 180 g. Add binder to 188 g (180+8), then add cure to 192 (188+4). You now have the proper proportion of ingredients to season 3lbs. 5 oz. of meat! And, you won’t kill anyone by using too much nitrite!

Hope this is understandable; if not just ask and I’ll try to further explain anything more.

Pops”