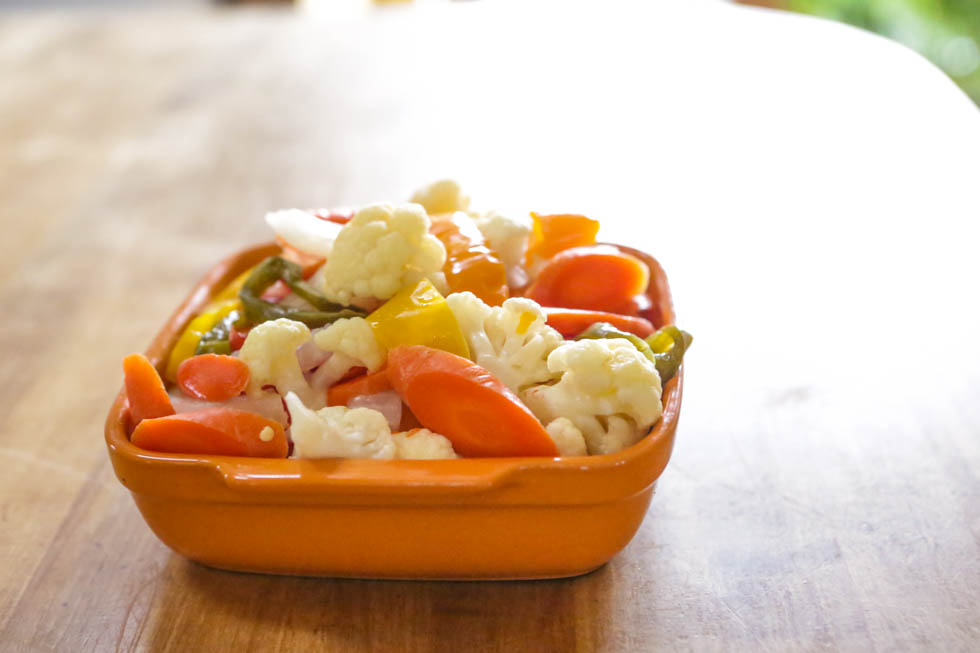
Fermentation–Salt Brining Parameters

From FermentationRecipes.com

How much salt should I use for a brine?
When mixing a brine within which you will submerge your fermentables, it is common to mix to a salinity level between 1.5% and 5% with the sweet spot being in the 2-3% range. This percentage is actually a proportion by weight, so if you divide the weight of your salt by the weight of your water used, you will come up with the percentage.  For example, a brine typically will have approximately 2.5 TBS salt to 4 cups of water, in my kitchen, those weights are:

  • 4 cups water – 960 grams – 32 oz
  • 1 TBS sea salt – 19 grams – .67ounce

Making your brine
to mix 4 cups of brine to various salinity percentages, dissolve the following amounts of salt into 4 cups of water:

2% brine – 1 TBS sea salt
3% brine – 1.5 TBS sea salt
4% brine – 2 TBS sea salt
5% brine – 2.5 TBS sea salt


Giardiniera Fermented No. 2 ToTry

Recipe below was inspired by http://www.fermentationrecipes.com/fermented-giardiniera-recipe/2146

1/2 head Cauliflower cut/broken into smaller florets
2 medium Carrots
1/2 white Onion
1/2 Jalapeño
1 Bell Peppers, colors of your choosing
8 cloves garlic
1 Tablespoon sea salt
1 Quart water

In his post he comments on the reduced salt as the recipe calls for fermenting with an air lock.

CSRs and Drum Sticks with dbl smoke

8/5/2017 – This was a simple smoke for lunches and dinners. Used 6 large chicken drum sticks and a package of CSRs. Mary had salted and peppered the drums 2 hours before then I added store bought cajun seasoning to all. The CSRs rested in the seasoning for about an hour. Smoked in the MES with both ends of the tray smoking with Lumberjack pecan pellets. Finished in the oven. Burning both ends of the Amazen tray with small pieces of meat did not work. Continue reading

Butts Advice to be Like the Pros

Extracts from http://www.smokingmeatforums.com/t/266473/why-doesnt-my-pulled-pork-taste-like-the-pros-restaurants#post_1737397

Chef JJ – There are any number of things the Q Joints are doing before and after the meat is pulled. Brines and Injections before smoking and/or Adding a good dusting of Rub, a thin Vinegar based finishing sauce, a thin Sweet Apple Juice based finishing sauce, a thinned version of their BBQ Sauce, even just Salt and Pepper and a flavorful liquid with the addition of Liquid Smoke is not out of the question. Could be a combination of ALL the above, which is what I do. I add rub and finishing sauce to my Pork and in the depths of winter, it’s Oven roasted PP finished with same plus Liquid Smoke. Your procedure is solid, start playing with additions to the meat at the end…JJ


Scholtz – Have you considered using an additional smoke source like the A-Maze-N tube smoker? I use it with my pellet smoker with good success. Usually with hickory in the smoker and I put mesquite in the tube. I also brine my butts overnight (12-15hrs) in a large 2 1/2 gal zip bag with a cup of pickling salt, 8 oz of dark molasses and 2 quarts of water.  Note: if the butt is already ‘enhanced’ by the mfg then cut the salt to 3/4 cup.

Rubs vary but my standard go-to is:
2 tsp whole cumin seed
2 tsp whole fennel seed
2 tsp whole coriander
2 tablespoon chili powder
2 tablespoon onion powder
2 tablespoon paprika, not smoked

Then it’s 225-250° until done.


Noboundaries – I’m not in the restaurant business, but there could be two reasons.

1. They are adding more rub after the meat is pulled.  For roasts that are NOT “enhanced” (pre-brined with up to a 12% salt solution), the meat can taste bland after smoked.  I add more rub to the pull after the smoke, and that stepped the flavor up quite a bit.

2. They could also be using pre-brined, “enhanced” pork butts and picnics.  There’s no need to add rub to the pull at the end of the smoke.  The enhanced meat is definitely saltier.  I’ve tried injecting and brining to enhance my own, but haven’t been able to duplicate the ones by Hormel and Smithfield.

Butt with Heavy Pecan Smoke

7/30/2017 – Smoked an approximately 7 lb pork butt in heavy smoke as the Amazen tray burned up in 4 hours. I had lit both ends and left it to flame too long so it had a lot of pellets burning. Decided to see how it would turn out with the heavy smoke. It had a very dark bark that was attractive and tasted good. No ashy taste and worth trying again. Continue reading

Old Fashioned Pancakes ToTry

Good Old Fashioned Pancakes

Recipe By: Dakota Kelly’s grandmother from here.
“This is a great recipe that I found in my Grandma’s recipe book. Judging from the weathered look of this recipe card, this was a family favorite.”

Ingredients.

1 1/2 cups all-purpose flour
3 1/2 teaspoons baking powder
1 teaspoon salt
1 tablespoon white sugar
1 1/4 cups milk
1 egg
3 tablespoons butter, melted

Directions

  1. In a large bowl, sift together the flour, baking powder, salt, and sugar. Make a well in the center and pour in the milk, egg and melted butter; mix until smooth.
  2. Heat a lightly oiled griddle or frying pan over medium high heat. Pour or scoop the batter onto the griddle, using approximately 1/4 cup for each pancake. Brown on both sides and serve hot.

Crispy Spatchcocked Chicken Recipe ToTry

  • Author: The Mediterranean Dish
  • Prep Time: 15 mins
  • Cook Time: 65 mins
  • Total Time: 1 hour 20 minutes
  • Yield: 4

ingredients

  • 4 lb whole chicken
  • Salt
  • 1 1/2 tsp allspice
  • 1 1/2 tsp garlic powder
  • 1/2 tsp sweet paprika
  • 1/2 tsp black pepper
  • 1/4 tsp ground nutmeg
  • Extra virgin olive oil

Optional 

  • 8 Campari tomatoes
  • 1 large sweet onion or Vidalia onion, peeled and quartered
  • Handful green olives

instructions

  1. One night before you plan to roast the chicken, spatchcock (butterfly) it (or ask your butcher to do this part for you). Place the chicken on a cutting board with its backbone facing you. Using a pair of sturdy kitchen shears like this one, cut out the backbone by cutting along both sides of the spine, and remove it. Remove the wing tips. (You can save the backbone and wingtips for making stock, if you like).
  2. Place the chicken, breast side up, on a large cutting board. Push down on the breastbone. Generously season with salt (and I mean generously) on both sides. Place the chicken, breast side up, on a shallow roasting dish. Refrigerate, uncovered, overnight.
  3. One hour before you plan to roast it, pull the chicken out of the fridge and set at room temperature.
  4. Preheat the oven to 425 degrees F, and adjust an oven rack right in the middle.
  5. In a small dish, mix the spices. Season the chicken on both sides. Pull its skin up, and apply some of the spice mix underneath as well.
  6. In a 12-inch cast iron skillet, add just enough extra virgin olive oil to coat the bottom. Heat on medium-high. As soon as the oil is shimmering, add the chicken, breast side down. Brown for 6-8 minutes, then flip over and brown on the other side another 5 minutes or so.
  7. Transfer the cast iron skillet to the heated oven middle rack. Slide it all way to the back of the oven, with the handle of the pan facing left.
  8. After 20 minutes, using oven mitts, carefully, turn the skillet 180 degrees so that the handle is now pointing right. Push to the back of the oven again. Roast for another 45 minutes, until the chicken is brown all over and the juices run clear. Remove from oven and let rest for 10 minutes before carving.
  9. Optional. If you like, about 20 minutes or so before you pull the chicken out of the oven, add the tomato and onion to a small roasting dish. Toss with olive oil and salt. Place on the lower rack of the oven to roast. When done, add a handful of spicy green olives to the roasted veggies and serve with the chicken. (see more ideas below)

notes

-If you don’t have time to salt the chicken and refrigerate overnight, do this as early as possible the day of.  Pat the chicken dry with paper towel before continuing on

-Other dishes to serve next to this Spatchcocked Chicken:

*Recipe adapted from Salt Fat Acid Heat by Samin Nosrat

Kimchi – 1st Time

7/23/2017 – The recipe below is from the downloaded copy of The Ferment Cookbook by Nourished Essentials. Our mods are after the dash or strike-out in the list of ingredients.

Yummy Kimchi

4 cups shredded cabbage (Napa, Chinese, or regular green cabbage)
1/2 cup minced red onion
1/4 cup sliced green onions
1/2 t crushed red pepper flakes – We probably had 1-1/2 T when it “looked right”.
2 cloves garlic, pressed
1 cup grated carrots
1 teaspoon grated ginger root
2 T Lemon Juice – fresh squeezed
1 T Sea salt

1 In a large bowl, combine cabbage, carrots, red onion, green onion, garlic, ginger, and red pepper flakes and stir ingredients together
2 Add lemon juice and salt and mash ingredients. Then cover with a towel and allow to set for 30 minutes.
3 Once the mixture has started to be broken down by the salt transfer the ingredients to your wide mouth mason jar.
4 Begin to try and extract as much liquid from the mixture as possible by pounding the mixture inside the jar.
5 If there is not enough liquid in the jar, just add some brine to ensure that the vegetables are covered.
6 Like sauerkraut, fermenting time with kimichi will depend a lot on taste preference and how much salt is added relative to your veggies, but we recommend at least 10 but can be as much as 30

08/13/2017 – 3 weeks – Tried it for the first time and it was good. The heat came on slow. The cabbage and carrots were a little crunchy.