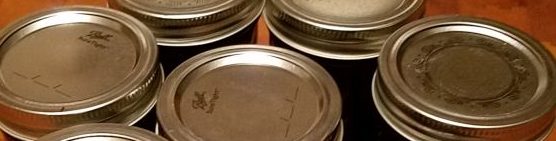
This was a slight mod on the fifth preparation of B&B pickles. This has 50% more crisping agent like No. 4.1 but it has jalapeno like earlier versions and the vinegar is all ACV. Other than that this is the same recipe. For some reason, these six cups of sliced cukes and 1.5 onions made 6½ pints whereas the last batch that was also six cups of cukes plus onions made only 2 quarts (4 pints). We also seemed to have a lot more leftover brine/spices after the 6 pints were topped off.
Continue reading6/10/2021 – Mary made this and it was great. It made a quart and a pint jar full.
Ingredients
- Brine
- 3/4 cup water
- 3/4 cup vinegar
- 1½ Kosher salt
- 24 black peppercorns
- 2 red onions, large monsters
- 3 jalapenos, large, 3″ and fat
Method:
- Heat the water. vinegar, salt, and pepper to almost boiling, turned off.
- Thinly slice the onions and the jalapeno.
- Heat a separate pot of water to boiling. Add the onions and jalapenos to a large enough pot and pour in the boiling water. Let steep for one minute. Drain and put the onions and jalapenos into mason jars.
- Pour in the brine to cover the veggies.
- Install lid, label with date, and refrigerate until gone.
6/10/2021 – On 6/23 & 6/24 we tried one jar of the blend below with the cayenne peppers and they were great.
Finally we think we can make dill pickles. Our recipe below was inspired by one at TheChunkyChef.com.
Ingredients
First 2 quarts:
- pickling cucumbers cut into spears enough to make 2 quarts
- Brine
- 2 cups water
- 1 cup white vinegar
- 1 Tbsp kosher salt
- 1-1/2 tsp granulated sugar
- 1 tsp dried dill seed in each jar
- 6-8 cloves garlic peeled, smashed, roughly chopped
- 5 whole black peppercorns in each jar
- 1 tsp whole yellow mustard seeds in each jar
- 2 dried cayenne peppers from our garden divided between the two jars
- pinch celery seed in each jar
Second 2 quarts as an experiment – Made the same except for sliced fresh jalapenos instead of cayenne peppers and same amount of dill weed instead of dill seed.
Instructions
- Slice cucumbers into typical spears and slices about 1/4″ thick.
- In a saucepan, make the brine by adding water, vinegar, salt, and sugar, and heat, stirring occasionally, until sugar and salt have dissolved. Set aside to cool to room temperature.
- While brine is cooling, add cucumbers to jars. Make sure to leave enough room for the brine and other ingredients.
- Add dill, garlic, mustard seed, black peppercorns, red pepper flakes, and celery seed.
- Pour in enough brine to cover the cucumbers, making sure to leave a 1/2″ or so at the top. Seal jars to be airtight.
- Refrigerate for at least 5 days.
6/8/2021 – This was the fifth preparation of B&B pickles. This has 50% more crisping agent than No. 4 made last June and it has a bit more Sabal Oelek. Other than that this is the same recipe.
Ingredients – Made 6 pints but one broke in the bath.
- 16 cups of sliced medium to small cucumbers from our garden sliced with the wavy mandoline blade.
- 1 large and 1/2 of a medium white onion, sliced the same as the cukes
- 1/3 cup pickling salt
- 10 cloves garlic, halved
- 2 cups of sugar
- 1-1/2 cups apple cider vinegar and 1-1/2 cups of white vinegar (we did not have enough apple cider vinegar)
- 2 tablespoons mustard seed
- 1-1/2 teaspoons turmeric
- 1-1/2 teaspoons celery seed
- 3 heaping tablespoons of Sambal Oelek
- 1 tablespoon per quart jar – Mrs. Wages Xtra Crunch calcium chloride granules. Last year we had added 1 teaspoon per pint and the pickles were still a little limp. So, this batch has 1 tablespoon per quart; i.e. 1.5 teaspoons per pint that is 50% more.
Directions
- Slice the cukes and onion with the mandoline. Combine cucumbers, onions, and pickling salt. Add 1 inch of ice cubes. Refrigerated for 2 hours. Removed remaining ice cubes and drained well in a colander.
- In a large kettle combined sugar, vinegar, mustard seed, turmeric, and celery seed. Heated to boiling and let rest until the cukes had been in the refrigerator with ice for 2 hours. Returned to slow boil and add cucumber mixture.
- As soon as it returned to boiling, pack cucumber mixture and liquid into hot, sterilized jars, leaving ½-inch headspace. Add garlic in the bottom, at half full and when full. Added a slightly rounded tablespoon of Mrs. Wages Xtra Crunch calcium chloride granules on top before the lid.
- Processed in a boiling-water canner for 10 minutes.
- Made three quarts.
5/27/2020 & 6/7/2021 – We have enjoyed the stuffed large Zucchini “boats” and wanted to make some spicier in a cajun style. In 2020 this was made with fresh Pattypan, zucchini, and yellow squash as well as green onions from the garden. It also uses our tasso. In 2021, they were made only with zucchini.
Ingredients & Preparation
- Cut the yellow squash and zucchini in half stem to bloom and scooped out the seeds. Cut the pattypans between the bloom and stem and scooped out the seeds.
- Rubbed them with EVO and Kit’s creole seasoning.
- Baked at 350 for about 30 minutes.
- Browned:
- 1 lb. of ground pork and 1 lb. of ground beef;
- 4″ of a Bertran’s green onion sausage and jalapeno sausage in the 2020 cook. In 2021, added the Alabama Speciality Meats “Hot” sausage; and
- 4 pieces of our tasso.
- Sauteed celery, onion, garlic, bell pepper, and red pepper flakes (from last year’s garden) in EVO
- Add brown meet to sauteed veggies
- Add parmesan cheese, Swanson’s chicken stock. Added the stock as needed to prevent it from becoming too dry. Simmered for about 30 minutes.
- Filled the baked “boats” and sprinkled with parmesan cheese and panko bread crumbs. In 2020 we also topped with chives; aka green onions,
- bake 20 minutes then let rest 20 minutes.
5/26/2021 – This dish was inspired by the recipe here. We liked it although it needed more peaches.
Continue reading5/24/2021 – This Frittata turned out very good and was made with one of our first zucchini this year.
5/27/2021 – Made it with 6 eggs, more veggies including mushrooms and shredded “Italian” cheese blend. The ingredients, directions, and Next Time ideas below are for this cook as it has great potential.
Ingredients
- 6 extra-large eggs
- about ¼ cup of half-and-half
- 1 medium zucchini (about 8″ long) from our garden
- 2 young onions from our garden
- 1 cup of portabello mushroom chopped
- about ½ cup of shredded “Italian” cheese blend or grated parmesan cheese
- Kit’s Creole seasoning
- Course ground black pepper and salt to taste
Directions
- With a wire whisk beat the eggs with the half-and-half, cheese, and creole seasoning
- Peel the zucchini leaving strips of the green peel for color. Dice it into ¼-½” cubes.
- Chop the onions into ¼”-½” pieces
- Saute the zucchini and onion in bacon grease in a No. 6 cast iron skillet with 4-5 shakes of creole seasoning. Saute until the edges begin to soften.
- Poured the egg mixture over the veggies on 5/27 although on 5/24 mixed the veggies into the eggs and stir to evenly distribute the veggies.
- On 5/24 added 2 tablespoons of butter to the skillet and when melted return the egg/veggie mixture. On 5/27 there was a lot of moisture and seemed to be plenty of bacon grease. But, it stuck to the skillet somewhat.
- On 5/27 put the skillet into a preheated 300° convection oven for about 30 minutes. It puffed up like a souffle. On 5/24 reduced the heat, cover, and cook until firm. Be careful to not cook too fast like Tom did this time.
Next Time
- Rather than cook it on the stovetop with a cover, cook it in the oven to make sure a dark hard “crust” is not created.
- Lightly shake on some more creole seasoning when put into the oven.
- Be sure to add the creole seasoning to the eggs and the veggies.
- Try it with 1 tsp Worcestershire sauce in the egg mixture.
This was inspired by Mike Hultquist at https://www.chilipeppermadness.com/recipes/creamy-jalapeno-sauce/
This creamy jalapeno sauce recipe uses no dairy or avocado, yet it is super creamy and wonderfully spicy. It’s an emulsification of jalapenos and oil and you’ll find it used widely in Tex-Mex cuisine. It is definitely one of my favorites, and incredibly easy to make.
Ingredients
8 fresh jalapeno peppers about 12 ounces by weight
1 small red onion chopped (about 6 ounces)
4-5 garlic cloves
½ cup Neutral oil use corn oil, avocado oil, or a neutral vegetable oil
1 teaspoon salt
Instructions
- Slice the stems from the jalapeno peppers and add them to a medium-sized pot along with the onion.
- Cover with water and bring to a quick boil. Reduce the heat and simmer for about 15 minutes, or until the jalapeno peppers soften up. They will turn dull green and you can pierce them with a fork easily, but do not let them become mushy.
- Strain but keep the liquid on hand.
- Add the boiled jalapenos and onion to a food processor along with garlic, oil, and salt. Process until very smooth and creamy, about 4-5 minutes.
- If you’d like a thinner sauce, add in a few tablespoons of the reserved boiling water.
Yields 2+ cups.
Bryan h February 29, 2020
This is a good version..BUT! As a south Texan let me tell you how this is REALLY made here by tejanos. Take your jalapeños and instead of boiling them (wth!) you roughly chop them and put them in a medium hot pan just lightly coated with oil. Allow them to sear without any browning! Stirring frequently until slightly soft and withered. Take out and put to the side. In the still hot pan do the same technique with a quarter of a WHITE OR SWEET Texas onion and a few cloves of garlic. Again do not brown them. Once done blend together in processor with neutral or olive oil with a small amount of salt to taste. This is the way it’s really done here. You’ll find the flavor to be much better than boiling.
5/4/2021 – We made this based on a copycat recipe for the popular dish at Olive Garden. Many things are different from that copycat version as this is a Cajun version while that was more of an Italian version. What we made was very rich and much enjoyed. This made 6 servings…lotsa leftovers!!!
Continue reading4/17/2021 – This chili turned out good and was inspired by the James Beard recipe in our copy of his book Barbeque with Beard on page 163. With all the peppers we added it turned out to have some kick but not too much for us. This is a true Texas Chili other than the addition of our canned tomatoes.
Continue reading